
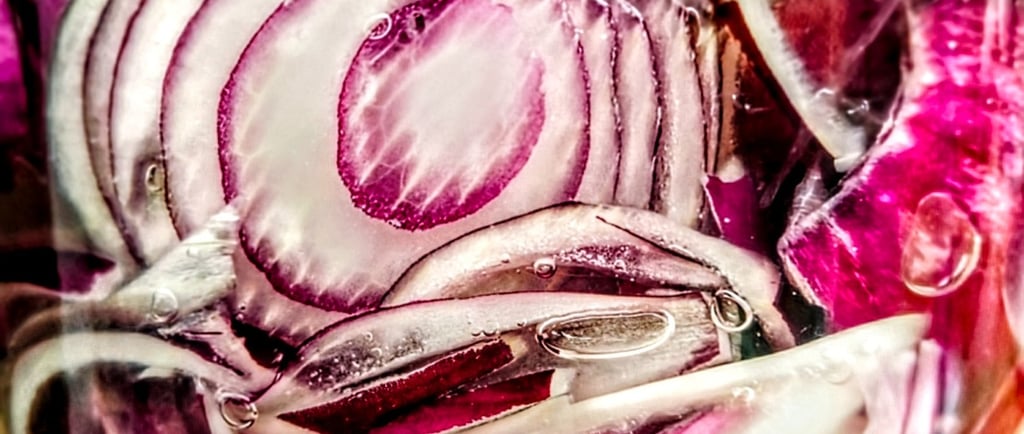
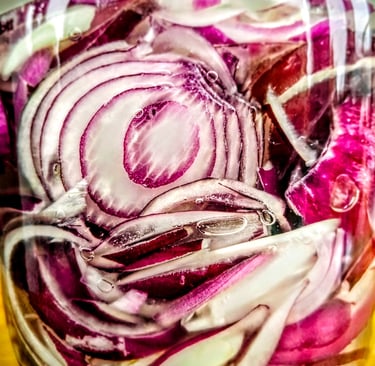
Probiotic Red Onions
Blog post description.
3/29/2026
Time Required:
20 min prep + 3 to 5 days fermenting
Difficulty:
Beginner
What You’ll Make:
Approx. 600g vibrant, probiotic-rich red onions
Why This Matters:
For Your Gut: Fermented onions are packed with probiotics, supporting a balanced microbiome and digestive health.
For Your Life: These tangy onions add instant flavour to salads, potato dishes, and grilled foods, and keep fresh for weeks in your fridge.
Ingredients (Supermarket-friendly)
Red onions – 600g
Garlic – 3 cloves
Bay leaves – 3-4 pcs
Peppercorns – ½ teaspoon, red and black
Cloves – ½ teaspoon (optional)
Sea or Himalayan salt – 20g (not table salt)
Water – 500ml (filtered or boiled & cooled)
What You’ll Need
Equipment (You probably have this):
Clean jar with lid (1L size)
Kitchen scales
Sharp knife and cutting board
Glass GU pot or small Ziploc bag (to keep onions submerged)
Prep Work (5 minutes)
Safety First:
Wash hands thoroughly with soap
Clean jar with hot soapy water (no need to sterilise if washed in dishwasher). DO NOT use antibacterial detergent as that will affect fermentation
Step-by-Step Instructions
1. Make the Brine
In a separate container, mix 20g salt (approx. 1 level tablespoon) into 500ml water
Stir and let it stand until completely dissolved
2. Prep Your Onions
Slice onions into half rings, 3mm thick
Place garlic, bay leaves, peppercorns, and cloves at the bottom of the clean jar
Top up with sliced onions
Onions should be lightly packed. Pour brine over until completely submerged
3. Seal & Set
Place the weight on top (GU jar or brine filled Ziploc bag) and top it over with brine until the liquid is almost reaching the top of the jar
Close the lid finger-tight (not super tight to allow some air in) or remove the seal from Kilner jar and close without it
Place on kitchen counter away from direct sunlight
Put a small plate underneath (it might bubble over)
The Waiting Game
Temperature: 18-24°C is ideal. Warmer = faster. Cooler = slower but more complex flavour
Days 1-2: Not much happening yet. Brine might look slightly cloudy. This is normal. You can start tasting
Days 3-4: Tiny bubbles appearing! Brine getting cloudier. Slightly tangy smell developing. Ready to taste again! Will notice slightly more acidic taste than day 1-2.
Day 5: Active fermentation with some bubbles. Cloudy brine. Tangy, slightly sour smell. Ready to be used.
Tasting & Storing
Prefer tangier? Let it sit for one or two more days and taste daily until just right. Remember the fermentation will still happen in the fridge
Remove the weight and close the lid tightly.
Lasts 1-2 months in fridge (keeps improving!).
Ways to Eat This
Fresh salads
Potato salad
Sandwiches and wraps
Tacos & nachos
Burgers& hot dogs
Top up steaks